The first stage of painting a mural begins in my sketchbook. I find that painted murals work best with a strong, clear outlines, so in my sketchbook I start with a pencil and then go over with a pen (I use a Unipen Fineline 0.3), rubbing out the pencil marks with an eraser.
Then I scan the drawing into photoshop, where I colour in the image. This is where strong, clear lines really help – outlining the mural design in photoshop is a pain, it’s much easier to get it right on the page first and it’s worth spending some time here.
The scanned image doesn’t need to be particularly high resolution, 72dpi is fine.
From there, I project this mural image onto a wall from my laptop.
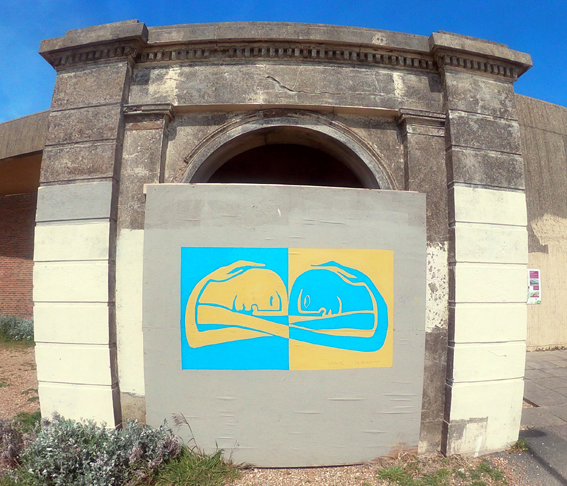
I look for locations for my murals that are relatively square and clean of other marks. Usually my murals sit with other graffiti – I like the roughness this gives. Hoardings where builders are doing work on a building are also great locations for murals!
To use a projector you’ll obviously need a power source. When I’m painting murals I’m not usually near a socket so I power the projector with a battery connected to an inverter. The projector plugs into the inverter. Alternately a friend with a van might come along.
Next I then trace around the projected image on the wall. This can be quite quick, it usaully takes about ten minutes or so.
Then the projector goes back in the bag and I paint the first colour onto the wall, going just over the edge of the lines I’ve drawn. Don’t worry about getting a clean sharp edges at this point – that will come later.
Once the first layer of paint is dry, I may go over it again with a second coat – this will depend on the type of paint and the surface. I generally use paint from my local B&Q; indoor or outdoor paint is fine for me, especially as I paint in public spaces where my pieces may get painted over quite quickly.
The next step is to tape the edges. I use Frog tape, which is a flexible type of masking tape that can make curves as well as straight lines. I apply the tape just behind the edge of the sections I’ve painted, so the rough edge of where I’ve already painted is visible.
Then I apply the second colour, again, this might need a second coat. You’re painting right up to the edge of the Frog tape and on top of it. The mural at this point will look like it has rough edges, but when you’re done, slowly pull off the Frog tape and you’ll find nice, sharp edges that have been bordered by the tape.
Finally, I use a fine brush to correct any small details and sharpen edges that I may have got wrong. I pay particular attention to faces, eyes and hands as that’s where the eye of the viewer tends to focus. Some mural painters may use a varnish to really give the piece a kick and protect it from the weather. Again, your local DIY store can advise.
Painting murals takes a bit of time – generally four or five hours. So it can help to have a couple of mates to help – I’ve found friends that work in painting and decorating are often willing to help, and are quite skillful with small details etc.

